

Measure, cut, glue, flatten, sand, and oil a hardwood board.
If you want a safe, good-looking board that lasts, you are in the right place. I have built many boards for home cooks and pros. I will show you how to make a wood cutting board for the kitchen with simple steps, clear photos in mind, and shop-tested tips. Read on to learn how to make a wood cutting board for the kitchen that looks great and works even better.
What You’ll Build and Why It Works
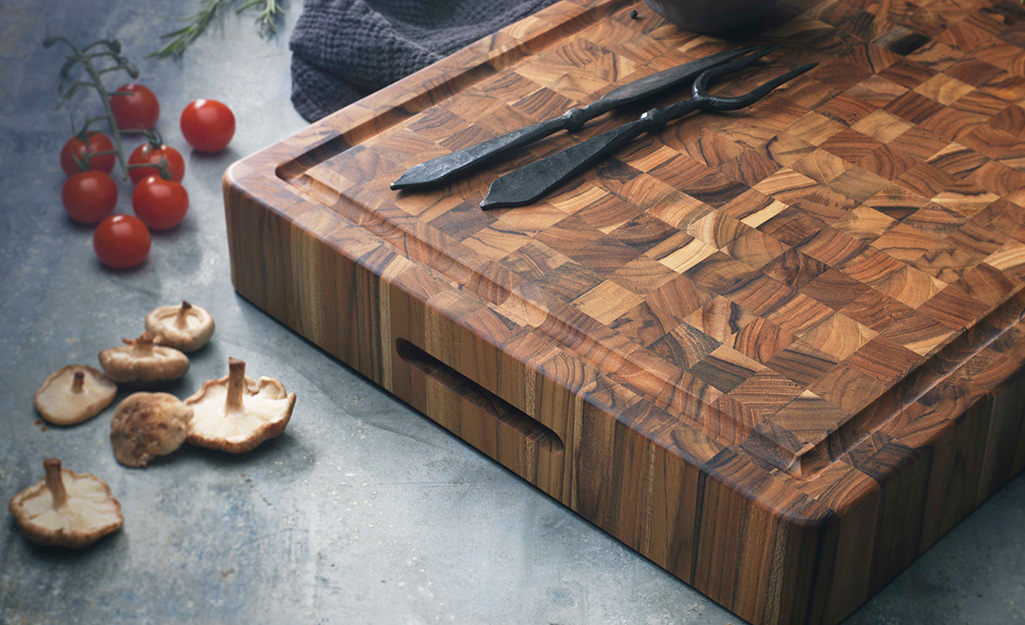
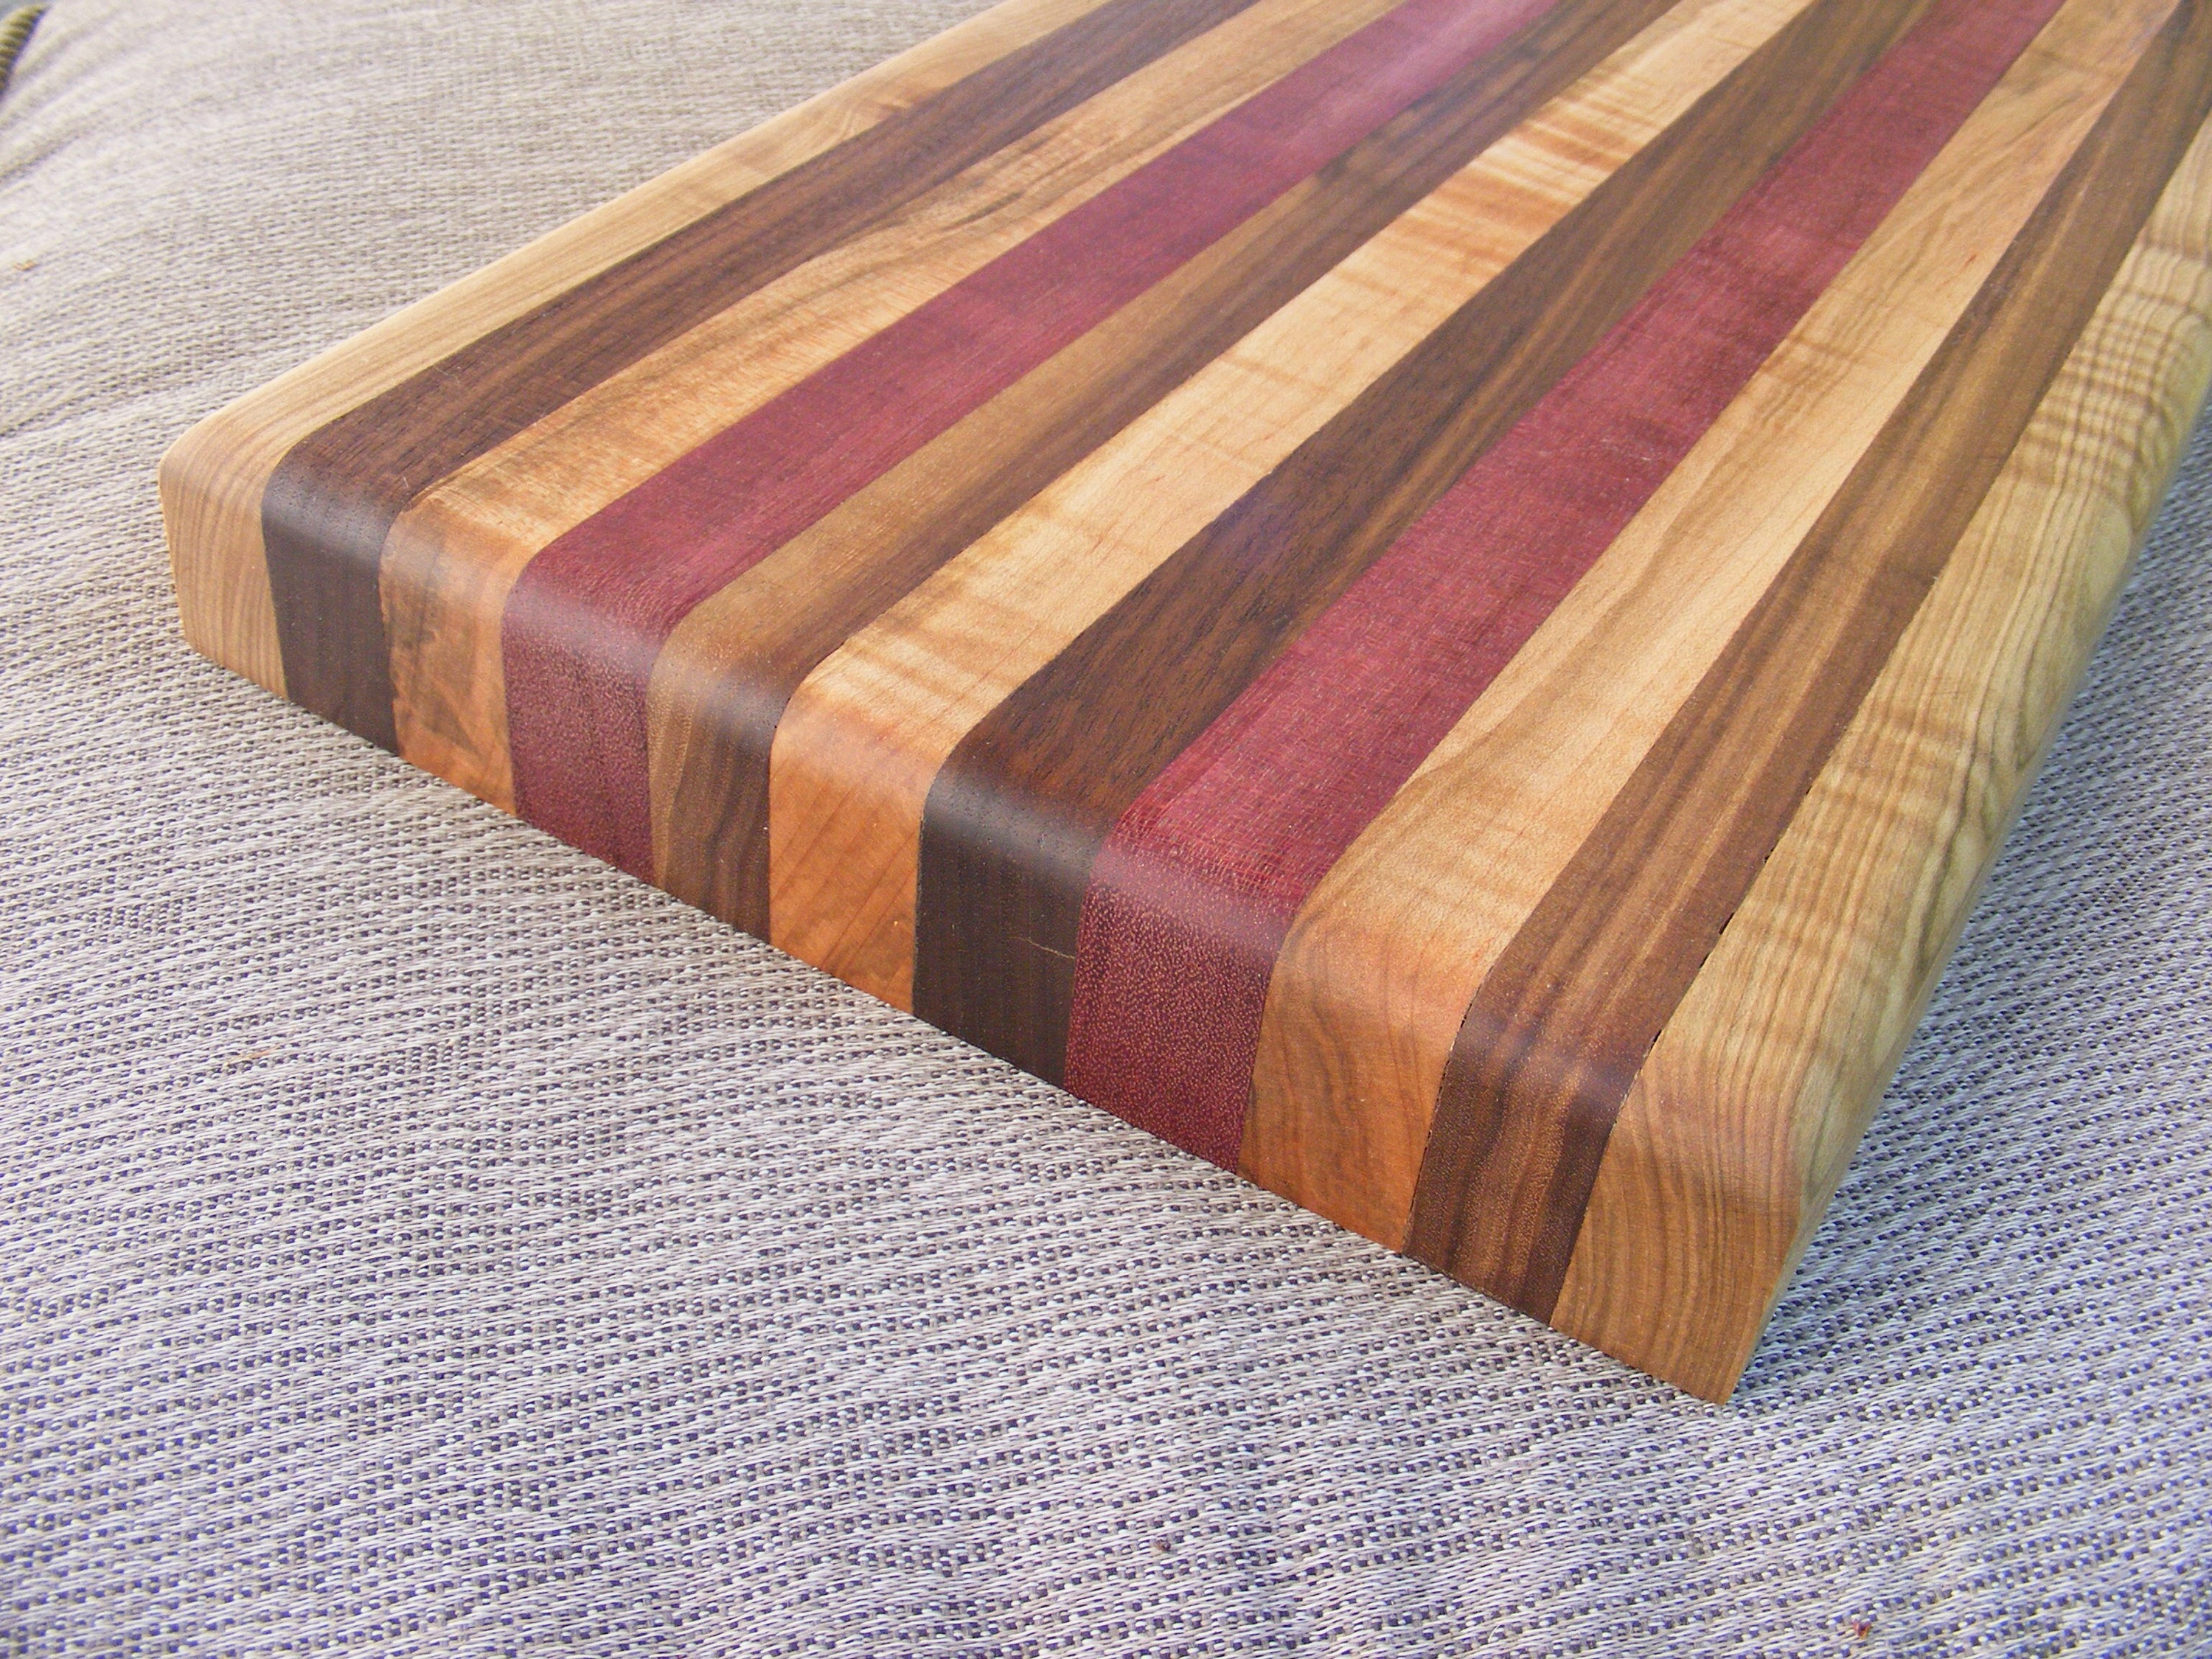
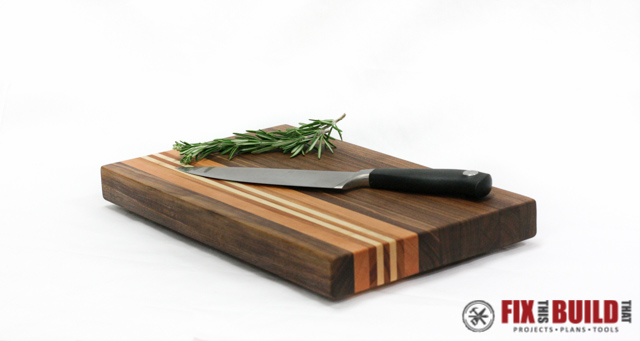
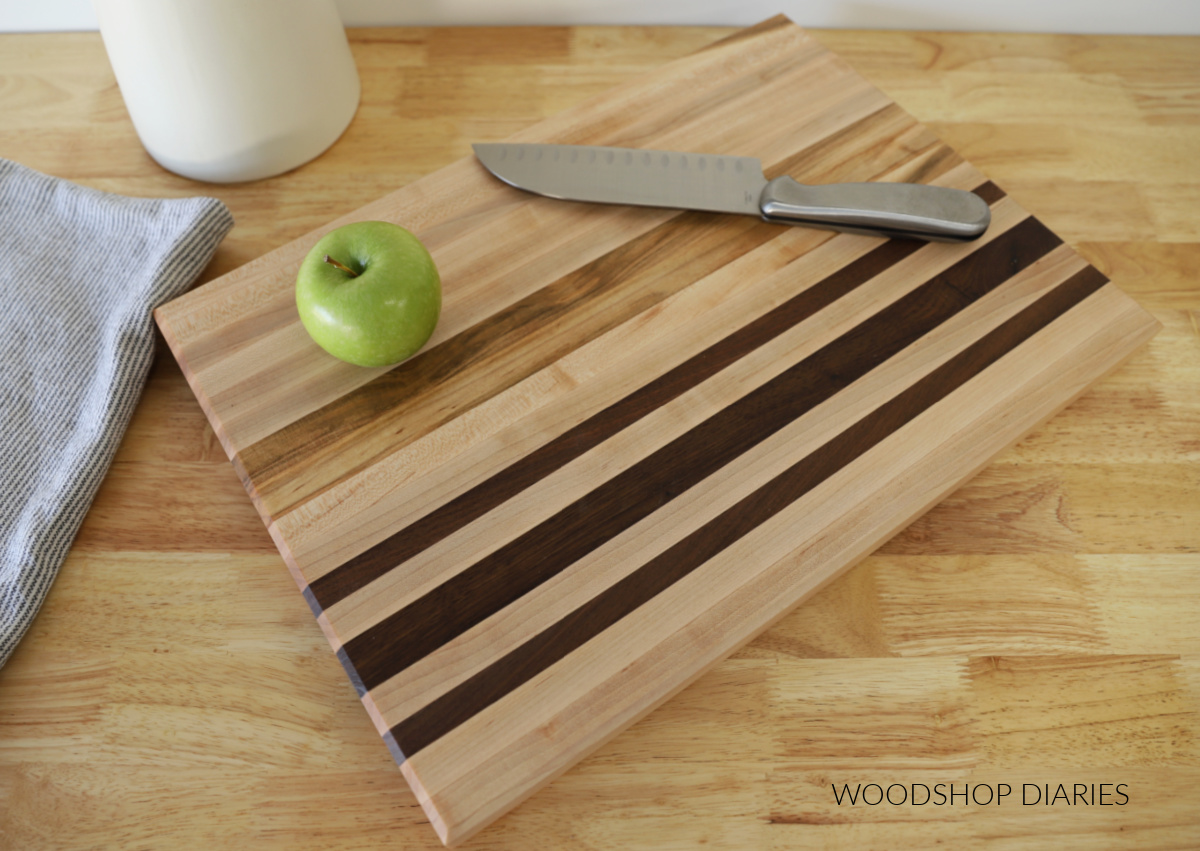
You will build a solid, food-safe cutting board that can stand daily use. It will be flat, smooth, and sealed with a simple finish. You can pick edge grain for speed or end grain for knife care. Both are strong and look great on a counter.
Edge grain shows long wood fibers on top. It is fast to make and stable. End grain shows wood fibers like a checkerboard. It is gentler on knives but takes more work. This guide on how to make a wood cutting board for the kitchen covers both paths and tells you which to choose.
Boards move with changes in humidity. Good design fights this. Balanced glue-ups, even grain, and the right finish help your board stay flat.
Materials and Safe Wood Choices
Use tight-grain hardwoods. They resist cuts and water. They also look clean.
- Hard maple is my top pick. It is dense, light in color, and food-safe.
- Walnut looks rich and hides stains well.
- Cherry warms with age and sands smooth.
- Beech and white oak can work if kiln-dried and sealed well.
- Avoid softwoods like pine. They dent and can taste like resin.
- Avoid exotic woods with known toxins or strong oils.
Use a waterproof, food-safe wood glue. Look for Type I or Type II PVA, which is rated for indirect food contact once cured. For finish, use food-grade mineral oil. Top it with a beeswax and mineral oil blend. Do not use olive oil or other cooking oils. They can turn rancid.
When learning how to make a wood cutting board for the kitchen, buy lumber that is flat and dry. Look for a moisture content near 6 to 8 percent. Ask the yard to surface two faces for you if you do not own a planer.

Tools and Setup
You can make a board with basic tools. Power tools just save time.
- Must-haves: circular saw or hand saw, sander, clamps, square, pencil, brush or rag, tape measure.
- Nice-to-haves: table saw, planer, jointer, router with roundover bit, thickness sander, scraper, calipers, cauls.
- Safety gear: hearing protection, dust mask, eye protection, push blocks.
Set up a clean, flat glue-up area. Cover it with craft paper or tape. Dry-fit your parts first. This one step saves many headaches when you learn how to make a wood cutting board for the kitchen in a small shop.
Design and Dimensions That Fit Your Kitchen
Pick a size that matches your sink and counter. Keep it light enough to move but big enough to chop.
- Daily board: 12 by 18 inches, about 1 to 1.25 inches thick.
- Carving board: 14 by 20 inches, about 1.5 inches thick, with a juice groove.
- Small prep board: 8 by 12 inches for fruit or herbs.
Think about features. A juice groove helps with roasts. Finger holds make lifting easy. A chamfer or roundover softens edges. When planning how to make a wood cutting board for the kitchen, sketch your layout and grain flow. Aim for strips with similar color and density. Alternate growth rings to reduce cupping.

Step-by-Step: How to Make a Wood Cutting Board for the Kitchen
Follow these steps for a clean, flat, and safe board.
-
Mill and square the stock
Flatten faces and square edges. If you lack a planer, buy S4S lumber. Check for twist with winding sticks. -
Rip to strips
Cut strips to 1.5 to 2 inches wide. Keep edges crisp and square. Label the grain direction and order. -
Dry-fit the layout
Arrange for looks and balance. Flip every other strip so growth rings curve up, then down. Mark witness lines across faces. -
Glue-up
Spread glue on both edges with a brush or roller. Use light, even coats. Clamp with even pressure. Add two cauls across the top to keep it flat. Wipe squeeze-out in 10 minutes. -
Check for flat
Sight down the board in clamps. Adjust pressure if needed. Small fixes now beat big sanding later. -
Cure and scrape
Let glue cure as directed. Scrape the squeeze-out before it hardens like stone. -
Flatten
Use a planer, router sled, or hand plane. Take light passes. If the board rocks, shim the low corners. -
Crosscut ends square
Trim ends on a miter saw or with a guide. Clean edges will make the board look pro. -
Optional: End-grain path
For end grain, rip the glued panel into new strips. Turn them so end grain faces up. Glue again. Flatten once more. -
Add details
Round edges with a router or sand block. Cut a juice groove with a router and a simple fence. Add finger holds with a cove bit or a shallow cutout. -
Sand the board
Sand 80, 120, 150, 180, and 220 grits. Vacuum dust between grits. Wipe with a damp cloth to raise grain, then sand 220 again. -
Finish
Warm mineral oil a bit. Flood the surface. Let it soak for 20 minutes. Wipe dry. Repeat two to four times. Top with a beeswax blend for a soft sheen. -
Cure and buff
Let the finish sit overnight. Buff with a clean cloth. The surface should feel silky. -
Break-in care
Oil daily for three days, weekly for a month, then monthly. This routine is key when you learn how to make a wood cutting board for the kitchen that stays stable.
Wonder if you need a planer? You do not, but it helps. A router sled and patience can get you a flat face with simple tools.
Finishing, Seasoning, and Food Safety
Food-safe means the finish will not leach or turn rancid. Mineral oil is inert. Beeswax seals pores and slows water. This is a proven mix for kitchen boards.
Apply oil in thin, even coats. Let each coat soak and wipe off the rest. Work all faces, including edges and ends. The end grain will drink more. When learning how to make a wood cutting board for the kitchen, do not rush this step. A well-oiled board resists stains and warping.
Keep the board dry for 24 hours before first use. Do not use the dishwasher. Do not soak it in a sink. Heat and water are the enemies here.

Maintenance, Cleaning, and Repair
Clean after each use with warm water and mild soap. Wipe dry at once. Stand it on edge to air out both sides. Disinfect with white vinegar or 3 percent hydrogen peroxide if needed. Avoid bleach unless very diluted and rinse well.
For stains, sprinkle coarse salt and scrub with half a lemon. For smells, use baking soda and a damp cloth. If your board looks dry, add more oil. If it cups, store it on edge and oil the concave side first. Learning how to make a wood cutting board for the kitchen also means learning to keep it fresh.
Small cracks can be wicked with thin glue, then clamped. Deep cuts call for a light resurface with a sander or a planer.
Cost, Time, and Sourcing Smart
A basic edge-grain board costs less than most store buys. Expect to spend a few hours over two days. Most of that time is glue cure and finish.
Save money by buying shorts or offcuts from a lumber yard. Many shops sell cutoffs cheap. When planning how to make a wood cutting board for the kitchen, ask for kiln-dried stock. Look for certified, sustainable sources if possible. Avoid bargain wood that is wet or twisted. It will fight you the whole way.

Common Mistakes and How to Avoid Them
Glue-starved joints lead to gaps. Use enough glue and spread it well. Excess squeeze-out is fine.
Boards cup when strips share the same ring direction. Alternate growth rings. Balance your layout. Sanding too fast can cause swirl marks. Climb the grits and vacuum between passes. A blotchy finish comes from dust or uneven sanding. Clean well and raise the grain before the last pass.
When folks ask how to make a wood cutting board for the kitchen, I stress one thing. Dry-fit every step before you commit. It saves wood, time, and stress.
Advanced Options: End-Grain, Inlays, and Juice Grooves
End-grain boards take more time. They shine with edge retention and grip. Plan on two glue-ups and more flattening.
Add a juice groove with a round-nose bit and a simple fence. Stop short of the corners for a clean look. For inlays, route a shallow channel and glue in a thin strip of contrasting wood. Keep glue off the top face and tape both sides. If you love how to make a wood cutting board for the kitchen, these upgrades make each piece unique.
Frequently Asked Questions of how to make a wood cutting board for the kitchen
What is the best wood for a cutting board?
Hard maple is the standard for home and pro kitchens. It is durable, tight-grained, and seals well.
Do I need a planer to build a cutting board?
No, but it makes flattening faster. A router sled or careful sanding will also work.
How often should I oil the board?
Oil daily for three days, weekly for a month, then monthly. Add a coat any time the surface looks dry.
Can I cut raw meat on a wooden board?
Yes, if you clean it right after use. Wash with soap and warm water, then dry and stand it up.
What finish is food-safe and easy to maintain?
Use food-grade mineral oil and a beeswax blend. Avoid vegetable or olive oils, which can go rancid.
Conclusion
You now know every step to build a safe, tough, and handsome board. You picked the right wood, made clean glue lines, and locked in a durable finish. You also learned how to fix common issues and keep your board in top shape.
Start today with a simple edge-grain build. As you gain skill, try end grain and add features. If this guide helped, share it, subscribe for more shop tips, or drop a question in the comments. And tell a friend you showed them how to make a wood cutting board for the kitchen at home.