
The air fryer has become a favorite kitchen tool for many people. It promises crispy fries, juicy chicken, and less oil—all with less mess than deep frying. But keeping your air fryer clean is important for both taste and safety. A dirty air fryer can lead to burnt smells, uneven cooking, or even smoke. Many people avoid cleaning their air fryer because they think it’s hard. The truth is, with the right steps, it’s simple and quick. Let’s break down how to clean your air fryer so it keeps working like new.
Why Cleaning Your Air Fryer Matters
You might wonder if you really need to clean your air fryer after every use. The answer is yes. Leftover grease and food bits can build up fast. This not only affects taste but can also cause your air fryer to smoke or smell bad. In some cases, too much buildup can even damage the appliance.
Here’s what can happen if you skip cleaning:
- Unpleasant odors that stick to your food
- Reduced cooking efficiency
- Possible mold growth in hidden spots
- Risk of fire from built-up grease
Cleaning your air fryer regularly keeps your food tasting fresh and your appliance safe.
What You’ll Need
Before you start, gather these basic cleaning supplies:
- Soft sponge or cloth
- Mild dish soap
- Soft-bristle brush or toothbrush
- Paper towels or a soft towel
- Warm water
Avoid harsh scrubbers or steel wool. These can scratch the nonstick coating inside your air fryer.
Credit: www.thekitchn.com
Step-by-step Guide To Cleaning Your Air Fryer
Here’s how to clean your air fryer the right way:
1. Unplug And Cool Down
Always unplug your air fryer and let it cool for at least 30 minutes. Cleaning a hot appliance can be dangerous.
2. Remove The Basket And Pan
Take out the basket, pan, and any removable trays. Most of these parts are dishwasher safe, but check your manual first.
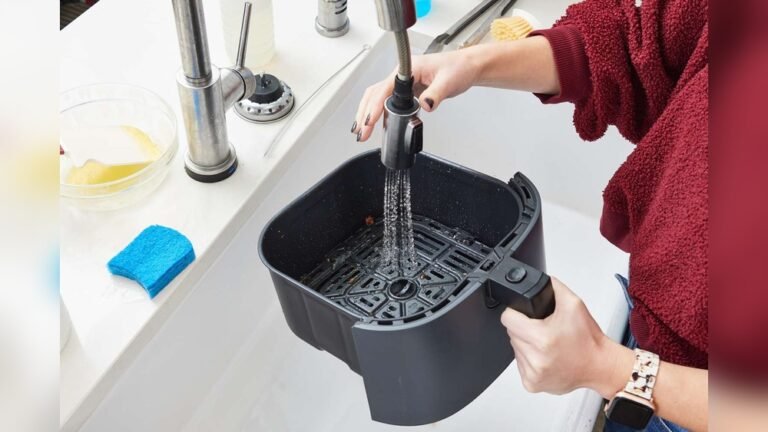
3. Soak Removable Parts
Fill your sink with warm soapy water. Let the basket and pan soak for about 10–15 minutes. This loosens stuck-on food and oil.
4. Scrub Gently
Use a soft sponge or brush to scrub away any residue. Pay extra attention to corners and mesh areas. For tough spots, a little baking soda on your brush can help.
5. Clean The Main Unit
Never put the main unit (the part with the heating element) in water. Instead, wipe it with a damp cloth. If you see food stuck to the heating element, use a soft brush to clean it gently.
6. Dry Everything
Dry all parts thoroughly with a towel or let them air dry. Moisture left inside can cause rust or mold.
7. Reassemble
Once everything is dry, put your air fryer back together. It’s ready for your next meal.
How Often Should You Clean?
You don’t have to deep clean your air fryer after every single use, but basic cleaning is a must. Here’s a simple guide:
| Cleaning Task | How Often | Reason |
|---|---|---|
| Wipe basket and pan | After each use | Removes grease and crumbs |
| Clean heating element | Every 3-5 uses | Prevents smoke and burning |
| Deep clean all parts | Weekly | Stops buildup and odors |
:max_bytes(150000):strip_icc()/faw-toaster-ovens-air-fryers-test-chefman-3-7qt-turbofry-rkilgore-111-487d903950824b019a89d671ec68e254.jpg)
Credit: www.foodandwine.com
Tips For Easier Air Fryer Cleaning
Cleaning doesn’t have to be a chore. Here are some tips to make it even easier:
- Line the basket with parchment paper or a silicone liner. This catches drips and crumbs.
- Avoid aerosol sprays. They can damage the nonstick coating.
- Don’t overload the basket. Too much food can cause splatter and make cleaning harder.
- Tackle stains early. The longer you wait, the harder they are to remove.
Air Fryer Cleaning: What Not To Do
Many new users make mistakes that damage their air fryer. Here’s what to avoid:
| Mistake | Why It’s Bad |
|---|---|
| Using metal utensils | Scratches and ruins nonstick surface |
| Submerging the main unit | Can cause electrical failure |
| Using harsh chemicals | Leaves dangerous residue on food |
Deep Cleaning For Stubborn Odors Or Stains
If your air fryer still smells or has stubborn stains, try this:
- Mix two tablespoons of baking soda with a little water to make a paste.
- Spread the paste on stained areas and let it sit for 10 minutes.
- Scrub gently and rinse well.
For lingering odors, put a small bowl of lemon juice in the basket and run the air fryer at 350°F for 3 minutes. This helps neutralize smells.
Quick Comparison: Air Fryer Vs. Traditional Fryer Cleaning
Cleaning an air fryer is much easier than a traditional deep fryer. Here’s a simple comparison:
| Feature | Air Fryer | Traditional Fryer |
|---|---|---|
| Oil needed | 1–2 tbsp | Up to 1 gallon |
| Cleaning time | 10–15 minutes | 30+ minutes |
| Odor after use | Low | High |
| Mess level | Low | High |
Credit: www.nytimes.com
Frequently Asked Questions
How Do I Remove Baked-on Grease From My Air Fryer?
Let the basket and pan soak in warm, soapy water for 15 minutes. Use a soft brush with a little baking soda to scrub the grease gently. Avoid sharp tools to protect the nonstick coating.
Can I Put Air Fryer Parts In The Dishwasher?
Most baskets and pans are dishwasher safe, but always check your air fryer manual. Some brands have delicate coatings that can wear out faster in the dishwasher.
What Should I Do If My Air Fryer Smells Bad After Cleaning?
Try running your air fryer empty with a bowl of lemon juice or vinegar inside at 350°F for a few minutes. This helps absorb and remove strong odors.
Is It Safe To Use Oven Cleaner On My Air Fryer?
No, oven cleaners are too harsh for air fryer surfaces. They can damage the nonstick coating and leave harmful residue. Stick to mild dish soap and water.
How Often Should I Clean The Heating Element?
Clean the heating element every 3–5 uses, especially if you cook fatty or greasy foods. Wipe with a damp cloth or use a soft brush for stuck-on bits.
Keeping your air fryer clean is simple if you follow these easy steps. Not only will your food taste better, but your appliance will also last longer. With just a few minutes after each use, you can enjoy healthier meals and save time on deep cleaning later. For more expert tips on kitchen appliance care, visit Consumer Reports.