
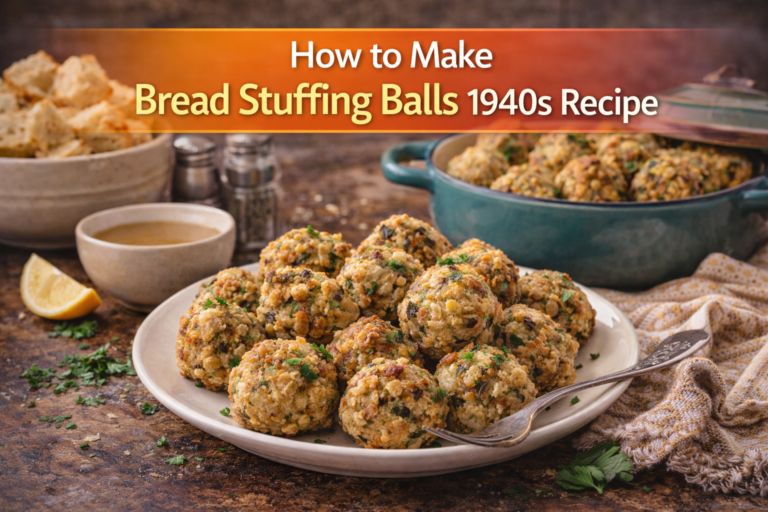
If you’ve ever wanted to bring a touch of nostalgia and classic comfort to your holiday table, learning how to make bread stuffing balls using a 1940s recipe is the perfect place to start. This timeless dish combines simple, wholesome ingredients that create a warm, savory flavor you’ll want to savor bite after bite.
Whether you’re cooking for family or hosting friends, mastering this recipe will give you a delicious side dish that’s both hearty and full of history. Ready to discover the secrets behind those perfectly seasoned, golden-brown stuffing balls that Grandma might have made?
Let’s dive in and bring a bit of the past to your kitchen today!
Best Air Fryer Oven: Top Picks for Healthier Cooking in 2026
Ingredients for 1940s Bread Stuffing Balls
This recipe uses the standard “war-grade” ingredients common in a 1940s kitchen.
- 6 cups Stale Bread Cubes: Use whatever you have—white, whole wheat, or even crusts. In the 40s, this was often “National Loaf” bread.
- 1/3 cup Margarine or Butter: (Margarine was the standard wartime substitute).
- 1 medium Yellow Onion: Finely diced.
- 2 stalks Celery: Finely diced (optional, as it was a “luxury” find depending on the season).
- 1/2 cup Fresh Parsley: Chopped fine.
- 1 tbsp Dried Sage: The quintessential flavor of the era.
- 1 tsp Dried Thyme or Poultry Seasoning: For depth.
- 1/2 tsp Salt & 1/4 tsp Black Pepper: To taste.
- 1 large Egg: Lightly beaten (or 2 tbsp of dried egg powder reconstituted with water).
- 1/4 to 1/2 cup Milk or Broth: Just enough to moisten.
Step-by-Step Instructions
1. Dry Your Bread
If your bread isn’t already stale, cut it into 1/2-inch cubes and spread them on a baking sheet. Leave them out overnight or toast them in a low oven at 300°F (150°C) for 10 minutes until they feel slightly crunchy.
2. Sauté the Aromatics
Melt the margarine (or butter) in a large skillet over medium heat. Add the diced onion and celery. Cook until they are soft and translucent—about 5 to 7 minutes. Stir in the sage, thyme, salt, and pepper during the last minute to wake up the dried herbs.
3. Mix the “Dough”
Place the bread cubes in a large mixing bowl. Pour the buttery onion mixture over the bread and toss gently. In a small cup, whisk the egg and 1/4 cup of the milk/broth together, then drizzle it over the bread.
4. Bind and Shape
Using your hands or a wooden spoon, mix until the bread is moistened but not soggy. If it’s too dry to hold a shape, add the remaining milk one tablespoon at a time.
Pro Tip: Squeeze a handful of the mixture; if it holds together without crumbling, it’s ready. Roll into 2-inch balls (roughly the size of a golf ball).
5. Bake to Perfection
Preheat your oven to 375°F (190°C). Place the balls on a greased baking sheet or in a muffin tin. Bake for 20–25 minutes until the outsides are golden brown and crisp, while the insides remain soft.
Authentic 1940s Variations
- The “Potato Stretch”: If bread was low, cooks would replace 1/3 of the bread with cold mashed potatoes. This makes for a denser, very moist ball.
- Sausage Balls: If the “Meat Ration” allowed, 1/4 lb of loose sausage meat was browned and mixed in for a savory boost.
- The Victory Garden Special: Add a finely grated carrot or a small chopped apple to the sauté for extra vitamins and natural sweetness.
3 Secrets for the Best Stuffing Balls
- Don’t Over-moisten: You want a “clump,” not a “paste.” If the bread turns into mush, the balls will be heavy rather than fluffy.
- Cold Hands, Warm Heart: If the mixture sticks to your hands, dip them in cold water between rolling each ball.
- Make Ahead: You can roll these balls a day in advance and keep them covered in the fridge. They actually hold their shape better if chilled before baking!
Serving Suggestions
Serving bread stuffing balls from a 1940s recipe offers a nostalgic taste of tradition. These golden, savory balls bring warmth and comfort to any meal. Proper serving enhances their flavor and makes the meal more memorable. Below are some simple ideas to complete your plate with style and taste.
Pairing With Main Dishes
Bread stuffing balls go well with roasted turkey or chicken. Their rich texture matches perfectly with juicy, tender meats. Pork roast or baked ham also pairs nicely. These main dishes balance the herbs and spices in the stuffing balls. For a vegetarian option, serve alongside roasted vegetables or mushroom gravy. The stuffing balls add a hearty touch to plant-based meals.
Complementary Sauces And Sides
Classic gravy is the top choice for stuffing balls. It adds moisture and deep flavor. Cranberry sauce brings a sweet, tangy contrast. Mashed potatoes or green beans work well as side dishes. A fresh salad with vinaigrette lightens the plate. Roasted carrots or Brussels sprouts add color and nutrition. These sauces and sides complete the vintage meal experience.
How Smart Kitchen Connect Can Help You with How to Make Bread Stuffing Balls 1940S Recipe
Exploring Practical Learning Through Classic Bread Stuffing Balls
Delving into a 1940s bread stuffing balls recipe offers more than just a nostalgic culinary experience—it opens doors to practical kitchen skills. For instance, mastering the art of preparing bread for stuffing not only enhances texture but also sharpens your understanding of ingredient balance. Experimenting with mixing and seasoning allows you to tailor flavors while honing your palate, a valuable skill for any home chef.
Incorporating timing and storage techniques from the recipe encourages efficient meal planning, especially useful for busy professionals. Embracing innovative tools and smart kitchen solutions, like those highlighted by Smart Kitchen Connect, can make these processes more streamlined and precise, marrying tradition with technology seamlessly.
Should you have questions or want to explore smart cooking strategies further, reaching out via admin@snartkitchenconnect.com can provide helpful insights. This approach not only preserves a historical touch but also promotes smarter, more efficient cooking practices in today’s modern kitchen.
Frequently Asked Questions
What Kind Of Bread Is Best For Stuffing Balls?
Artisan breads like sourdough, rye, whole-grain, or herbed bread work best for stuffing balls. They absorb flavors well and hold shape.
What Was Stuffing Originally Made Of?
Stuffing was originally made from grains like spelt, mixed with herbs, spices, vegetables, nuts, and sometimes organ meats.
How Far In Advance Should I Make Stuffing Balls?
Make stuffing balls up to one day in advance. Store them covered in the refrigerator until cooking.
How To Stop Stuffing Balls From Falling Apart?
Use moist bread and enough binding ingredients like eggs and broth. Press firmly while shaping. Chill before cooking.
Conclusion
Making bread stuffing balls using a 1940s recipe brings a taste of history to your table. This simple, hearty dish blends bread, herbs, and broth perfectly. It adds warmth and comfort to any meal. Try this recipe to enjoy a classic side dish with rich flavors.
Baking these stuffing balls is easy and fun for all cooks. Serve them at family dinners or holiday feasts. Experience a traditional recipe that has stood the test of time. Your guests will love the homemade touch and tasty result.