
Installing a kitchen hood can improve your kitchen’s air quality. It helps remove smoke, steam, and smells from cooking. This guide will show you how to install a kitchen hood easily. You do not need to be an expert. Just follow the steps carefully.
What Is a Kitchen Hood?
A kitchen hood is a device above your stove or cooktop. It pulls out smoke and smells. It can vent air outside or clean air and send it back inside.
There are two types of kitchen hoods:
- Ducted (vented) hood: Sends air outside through pipes.
- Ductless (recirculating) hood: Cleans air with filters and sends it back inside.
Ducted hoods are better for strong cooking smells and grease. Ductless hoods are easier to install but need filter changes.
Read Ikea Kitchen Renovation Cost: Ultimate Budget Guide & Savings Tips
What You Need Before You Start
Before installing your kitchen hood, gather these tools and materials:
- New kitchen hood
- Measuring tape
- Drill and drill bits
- Screwdriver
- Stud finder
- Level
- Pencil or marker
- Masking tape
- Wire connectors
- Safety glasses and gloves
- Vent duct (for ducted hood)
- Electrical tape
Make sure you have power off at the circuit breaker before starting electrical work.
Step 1: Remove the Old Kitchen Hood
If you already have a kitchen hood, you must remove it first. Follow these steps:
- Turn off power to the hood at the breaker box.
- Unscrew and detach the old hood from the wall or cabinet.
- Disconnect the electrical wires carefully.
- Remove the vent duct if your hood uses one.
Keep the screws and parts. You may need them later.
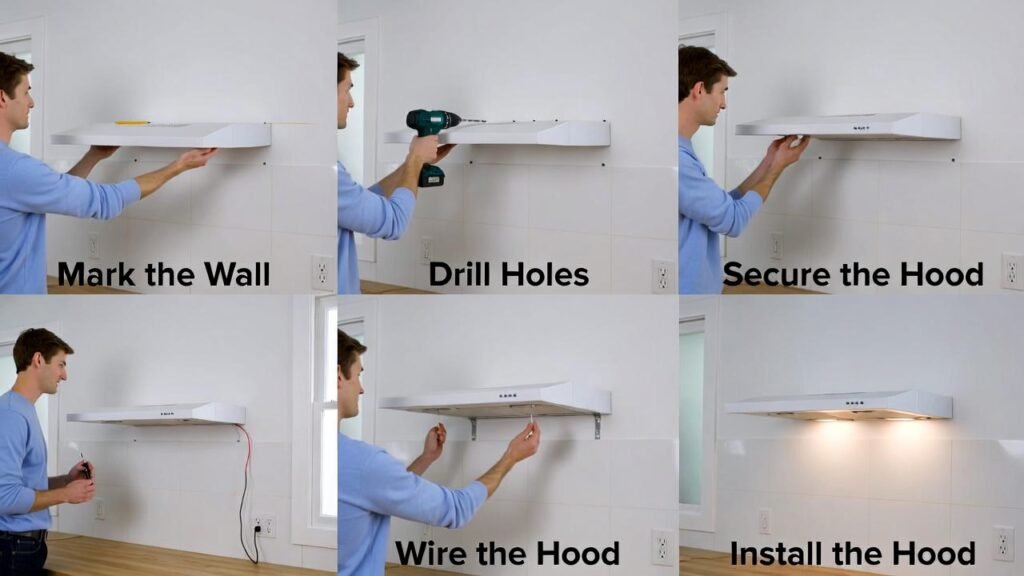
Step 2: Measure and Mark the New Hood Location
Use the measuring tape to find the right height for your new hood. The usual height is 24 to 30 inches above the cooktop.
Mark the center of the cooktop on the wall. Use a pencil to mark where the hood will be fixed.
Find wall studs with the stud finder. Mark stud locations. You will attach the hood to these studs for strong support.
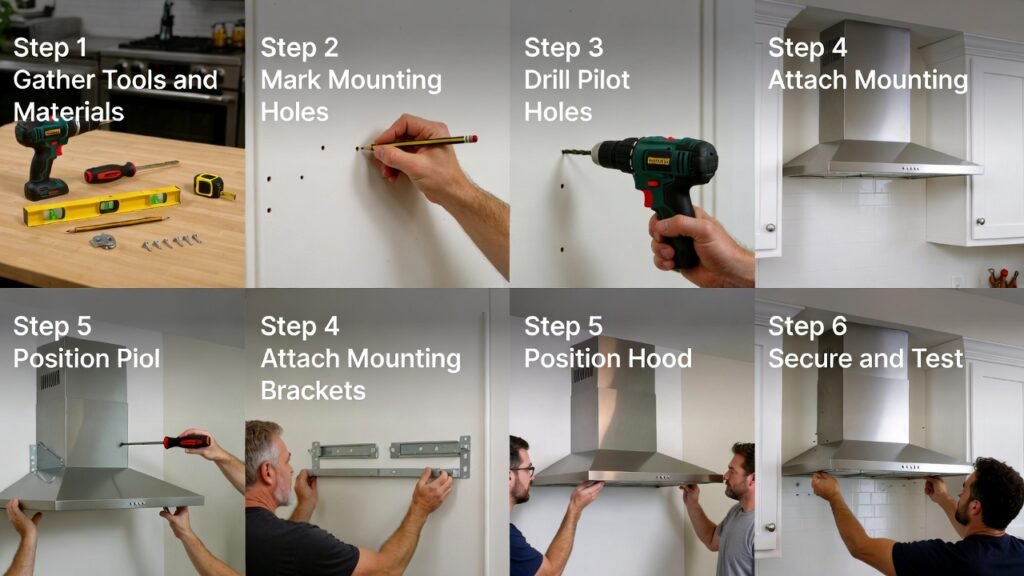
Step 3: Prepare the Wall and Vent Openings
If your new hood needs a vent, you must prepare the wall or ceiling for ductwork. Follow these steps:
- Measure the size of the duct outlet on your hood.
- Mark this size on the wall or ceiling where the vent will go out.
- Cut the hole carefully using a drywall saw.
- Install the vent pipe through this hole.
If you have a ductless hood, you can skip this step.
Step 4: Connect the Ductwork (For Ducted Hoods)
Attach the vent pipe to your hood’s outlet. Use metal tape to seal the joints tightly. This keeps air from leaking.
Run the duct pipe to the outside vent cover. Make sure the pipe is straight. Avoid sharp bends that block airflow.
Secure the outside vent cover on the exterior wall. This lets air escape outside.
Step 5: Connect the Electrical Wires
Turn off the power at the breaker box again.
Open the electrical box on the new hood. You will see wires inside.
Match the wires from the wall to the wires on the hood:
- Black (live) to black
- White (neutral) to white
- Green or bare copper (ground) to green or bare copper
Use wire connectors to join the wires. Wrap with electrical tape for safety.
Step 6: Mount the Kitchen Hood
Hold the hood in place. Align it with your pencil marks.
Use a level to make sure it is straight.
Screw the hood into the wall studs using strong screws. Make sure it feels secure.
Step 7: Test Your New Kitchen Hood
Turn power back on at the breaker box.
Switch on the hood. Check the fan and lights work.
For ducted hoods, check if air flows well outside.
For ductless hoods, check if the filters are in place and air comes out clean.
Extra Tips for Installing Kitchen Hood
- Always read the hood’s manual before starting.
- Ask for help if the hood is heavy.
- Wear safety glasses and gloves during installation.
- If you are not sure about electrical work, hire a professional.
- Clean or change filters regularly for ductless hoods.
- Check local building codes for venting rules.
Why Installing a Kitchen Hood Is Important
Cooking creates smoke, steam, and odors.
A kitchen hood removes these harmful particles. It keeps your kitchen fresh and clean.
Ducted hoods also reduce grease on walls and ceilings.
This helps prevent stains and fires.
Summary Table of Kitchen Hood Types
| Type | How It Works | Pros | Cons | Best For |
|---|---|---|---|---|
| Ducted (Vented) | Pulls air outside through ducts. | Very effective at removing smoke and odors. | Needs ductwork and professional install. | Heavy cooking, gas stoves. |
| Ductless (Recirculating) | Filters air and sends it back inside. | Easy to install, no duct needed. | Needs regular filter changes, less effective. | Small kitchens, apartments, light cooking. |
Final Words
Installing a kitchen hood improves your cooking space.
It removes smoke and keeps air fresh.
Follow the steps carefully, and take your time.
If you follow this guide, your kitchen will be better and cleaner.
Frequently Asked Questions
Can I Install A Kitchen Hood Myself?
Yes, you can install a kitchen hood yourself with the right tools and planning. The process includes removing the old unit, preparing wall and vent openings, connecting ductwork and wiring, and securing the new hood. DIY installation suits those comfortable with basic electrical and carpentry tasks.
Do Range Hoods Have To Be Vented Outside?
Range hoods do not always need to vent outside. Ductless models filter and recirculate air but require frequent filter changes. Vented hoods exhaust smoke, grease, and odors outside, providing better air quality and often meeting local codes, especially for gas cooktops.
Do You Need An Electrician To Install A Range Hood?
An electrician is recommended to install a range hood if it involves new wiring or electrical connections. Proper electrical setup ensures safety and code compliance. Simple installations may not require an electrician, but professional help guarantees correct and secure operation.
Is It Better To Hardwire Or Plug In A Range Hood?
Hardwiring a range hood offers a cleaner look and reliable power. Plug-in models provide easy installation and flexibility. Choose hardwiring for permanent setups and plug-in for quick, temporary use. Always follow local electrical codes and safety guidelines during installation.